
Own-CNIC checks only · Reviewed 29 September 2026 · Each code graded by where it is documented
A SIM number check code is a short code you dial from your own SIM, and the network answers with that SIM’s own number. Pick your network’s code from the table below; no code, SMS, app or website shows who owns a number whose SIM is not in your hand. For every other SIM question, from verification status to a handset’s PTA standing, which official check answers which question sets out the route.
SIM number check code for every network: code, grade and fallback
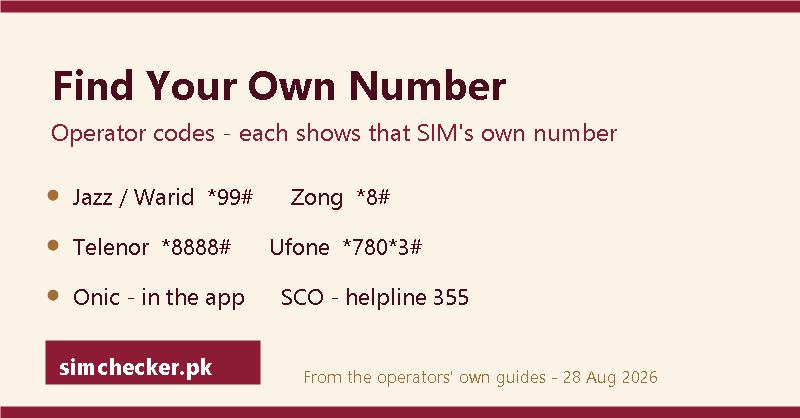
Four networks answer an own-number code; for Onic and SCO no dialled code is documented, so their rows give the helpline instead.
| Network | Own-number code | Verification grade | Charge, where a dated source states it | If the code does not answer |
|---|---|---|---|---|
| Jazz (Warid lines included) | *99# | Operator-published: Jazz’s Smart Tips page, “How to check Jazz number” | No charge (ProPakistani, 10 March 2020) | Call 111 from a Jazz prepaid line, or 0 111 300 300 from any network |
| Zong | *8# | Community-confirmed | No balance needed (ProPakistani, 29 January 2020; PhoneWorld, 22 April 2021) | Call 310 from a Zong line, or the UAN (051) 111-222-111 |
| Telenor | *8888# | Community-confirmed | Not stated by the operator or the press | Send an empty SMS to 7421, the number check on Telenor’s own self-service code sheet, or call 345 |
| Ufone | *780*3# | Community-confirmed | Free, works at zero balance (PhoneWorld, 21 July 2026) | Dial *1#, the second code in the same guide, or call 333 from a Ufone line |
| Onic | None: Onic says it does not officially support a code for checking your number | Not applicable | Not applicable | Call the Onic helpline, 051-111-339-111 |
| SCO (SCOM) | No dialled code documented | Not applicable | Not applicable | Call 355 from a SCOM line, or 111-726-726 |
How do I check my SIM number?
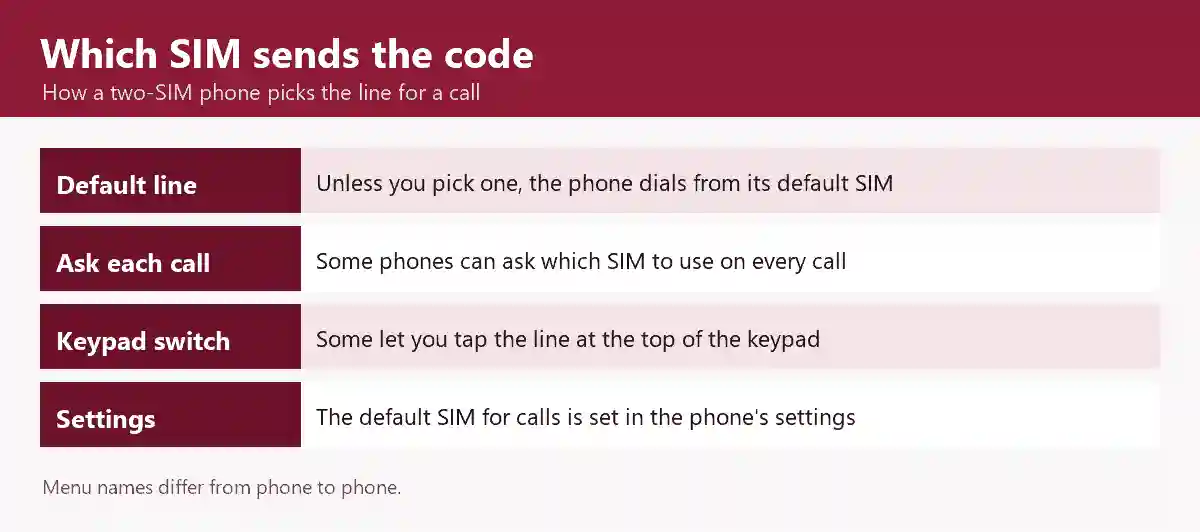
Type your network’s code into the phone’s dialler and press call; the reply may give the number in the 92 format, without the leading 0. The code is a USSD code; on a two-SIM phone, pick the SIM before you dial.
If an error appears instead of a number, the last column of the table gives the next route.
Warid number check code: the Jazz row applies
A Warid SIM takes the Jazz row of the table, because Warid lines are part of the Jazz network (Dawn, 7 February 2017); the merger history and what else a Warid line can show are in Warid SIM owner details on the Jazz network.
Own-number codes by network: what each guide adds
Each network’s own guide carries what one table row cannot hold.
- Jazz: the Jazz guide covers the Jazz number check code and Jazz’s other self-check codes.
- Zong: the Zong SIM number check code page covers the code on Zong’s data devices and the older strings still quoted in 2020 guides.
- Telenor: every Telenor number route is set out under Telenor SIM number check code, and Telenor’s July 2026 merger into PTML, the company behind Ufone, has its own dated section.
- Ufone: both Ufone strings, and the next step when neither answers, are walked through in the Ufone SIM number check code section.
- Onic: PTA’s order of 11 September 2026 stopped new Onic connections while Onic says existing lines carry on; the Onic SIM number check section covers Onic’s number routes, and Onic’s helpline and support routes are listed there too.
- SCO: SCO serves Azad Jammu and Kashmir and Gilgit-Baltistan; the SCOM SIM check section and SCO’s helpline and contact routes cover the rest.
Codes that report whether a SIM is biometrically verified are a separate family, covered with the verification process.
CNIC SIM number check: a count per network, not the numbers
A CNIC (ID card) SIM number check tells you how many SIMs each network has registered against your 13-digit CNIC, whether you send the CNIC to 668 or enter it at cnic.sims.pk, and not which numbers those SIMs carry. The steps for both routes are in how to check how many SIMs are on your CNIC, step by step, with a separate answer on how to check all SIM numbers on an ID card.
How to check SIM owner: the 667 reply for the SIM in your hand
Text MNP to 667 from a Jazz, Zong, Telenor or Ufone SIM you are holding and the operator replies with the name that SIM is registered under and a part-masked CNIC. The 667 route on an Onic line is set out in the Onic guide, and for a SCOM line the 667 text is not a documented check. The reply’s other fields are covered in MNP and the 667 reply, field by field. Getting the registration record of someone else’s line without their authorisation, from a website, an app or a shop, is an offence under section 16 of PECA 2016 (what the law says about SIM records).
SIM number check karne ka tarika, Roman Urdu mein
Har network ka SIM number check karne ka code upar wali table mein hai. Code dial karne ka tarika aur baqi SIM checks, jaise apne CNIC par kitni SIM hain aur SIM kis ke naam par hai, Roman Urdu mein yahan hain: SIM check karne ka poora tarika.
Questions people ask about SIM number check codes
How do I check my SIM number online?
Online, the route is the operator’s own self-care app or account on the line you are checking, and the guides that describe these apps say the number appears inside the app. The Telenor post covers the My Telenor app, and the Ufone post covers Ufone’s self-care app and helpline.
How to find SIM card number?
The holder the SIM came in, often called the SIM jacket, may carry the phone number; the Zong data-SIM guide and the Onic number guide show where. That phone number is what “SIM number” means in everyday use, and what a SIM number is covers the term’s other sense.
What is the phone number check code?
For the number of your SIM, it is your network’s code in the table above. If the phone itself is meant, the code is *#06#, which shows the handset’s IMEI; finding an IMEI and checking it with PTA covers what to do with it next.
How do I check a mobile number?
If the number is not yours, the official check open to anyone is which network carries it, through PTA’s 76367 service; the network behind a number explains how to send the check and read the reply, and a number you do not recognise covers what to do about the caller.
Can I check my SIM details?
Yes, as long as the SIM is in your hand and the CNIC is yours. Three official checks cover it, and each is explained once on this page: the own-number code table, the 667 reply and the CNIC SIM number check.
Where the facts on this page come from
Jazz *99#: Jazz Smart Tips page (no printed date) and ProPakistani, 10 March 2020 · Jazz helplines: jazz.com.pk help page (no printed date) · Warid and Jazz: Dawn, 7 February 2017 · Zong *8#: ProPakistani, 29 January 2020, and PhoneWorld, 22 April 2021 · Zong helplines: zong.com.pk contact page (no printed date) · Telenor 7421 and 345: Telenor’s self-service code sheet (file dated 24 November 2020), ProPakistani, 3 March 2021, and PhoneWorld, 22 April 2021 · Telenor and PTML: PTCL release, 1 July 2026 · Ufone *780*3#, *1# and the app route: PhoneWorld, 21 July 2026; Ufone 333: ufone.com customer-care page (no printed date) · Onic: Onic’s number guide (9 September 2026) and onic.pk FAQ (no printed date); PTA’s order of 11 September 2026 as reported by Dawn and ProPakistani, 15 September 2026 · SCO 355: sco.gov.pk (no printed date) · SCO 111-726-726 and its service area: PhoneWorld, 20 March 2020, with the same help line on sco.gov.pk · 668 and cnic.sims.pk: PTA FAQ “SIM(s) Information” (no printed date) · 76367: cnic.sims.pk (no printed date) · 667 and the networks it covers: PTA MNP Porting Process Guidelines V7.9.15 (no printed date), with PTA’s cellular mobile licensee list (August 2025) for the operators’ current names · PECA 2016 s.16: Pakistan Code consolidated text (no printed date) · *#06#: dirbs.pta.gov.pk (no printed date) · choosing the SIM on a two-SIM phone: Apple’s Dual SIM guide (17 September 2026) and Google’s Pixel dual-SIM help (no printed date) · SIM jacket and SIM holder: Zong’s MBB guide (no printed date) and Onic’s number guide. Reviewed by Muhammad Zayan on 29 September 2026.
Where to go next
Next steps from here: moving your number to another network, step by step; finding a genuine franchise when a SIM needs a counter visit; and eSIMs in Pakistan, network by network.
SIM owner details in Pakistan: the official checks, from the top